
The first ever Garden Horizons update launched today, and it’s the Botanist update. It was the first official update and the first proper admin abuse, and it was truly amazing. They did crazy good restocks; we got SIX cherry seeds stocked, as well as endless sprinklers, cabbage seeds and more.
The Botanist update is quite in-depth, and I’ve seen some “guides” where people haven’t even completed the entire quest, so I’ve completed the quest twice, so I can tell you and show you how it works, tips on how to do the quest quickly and which seeds you should and shouldn’t plant, so you can farm the brand new seed packs.
What Is The Garden Horizons Botanist Update?
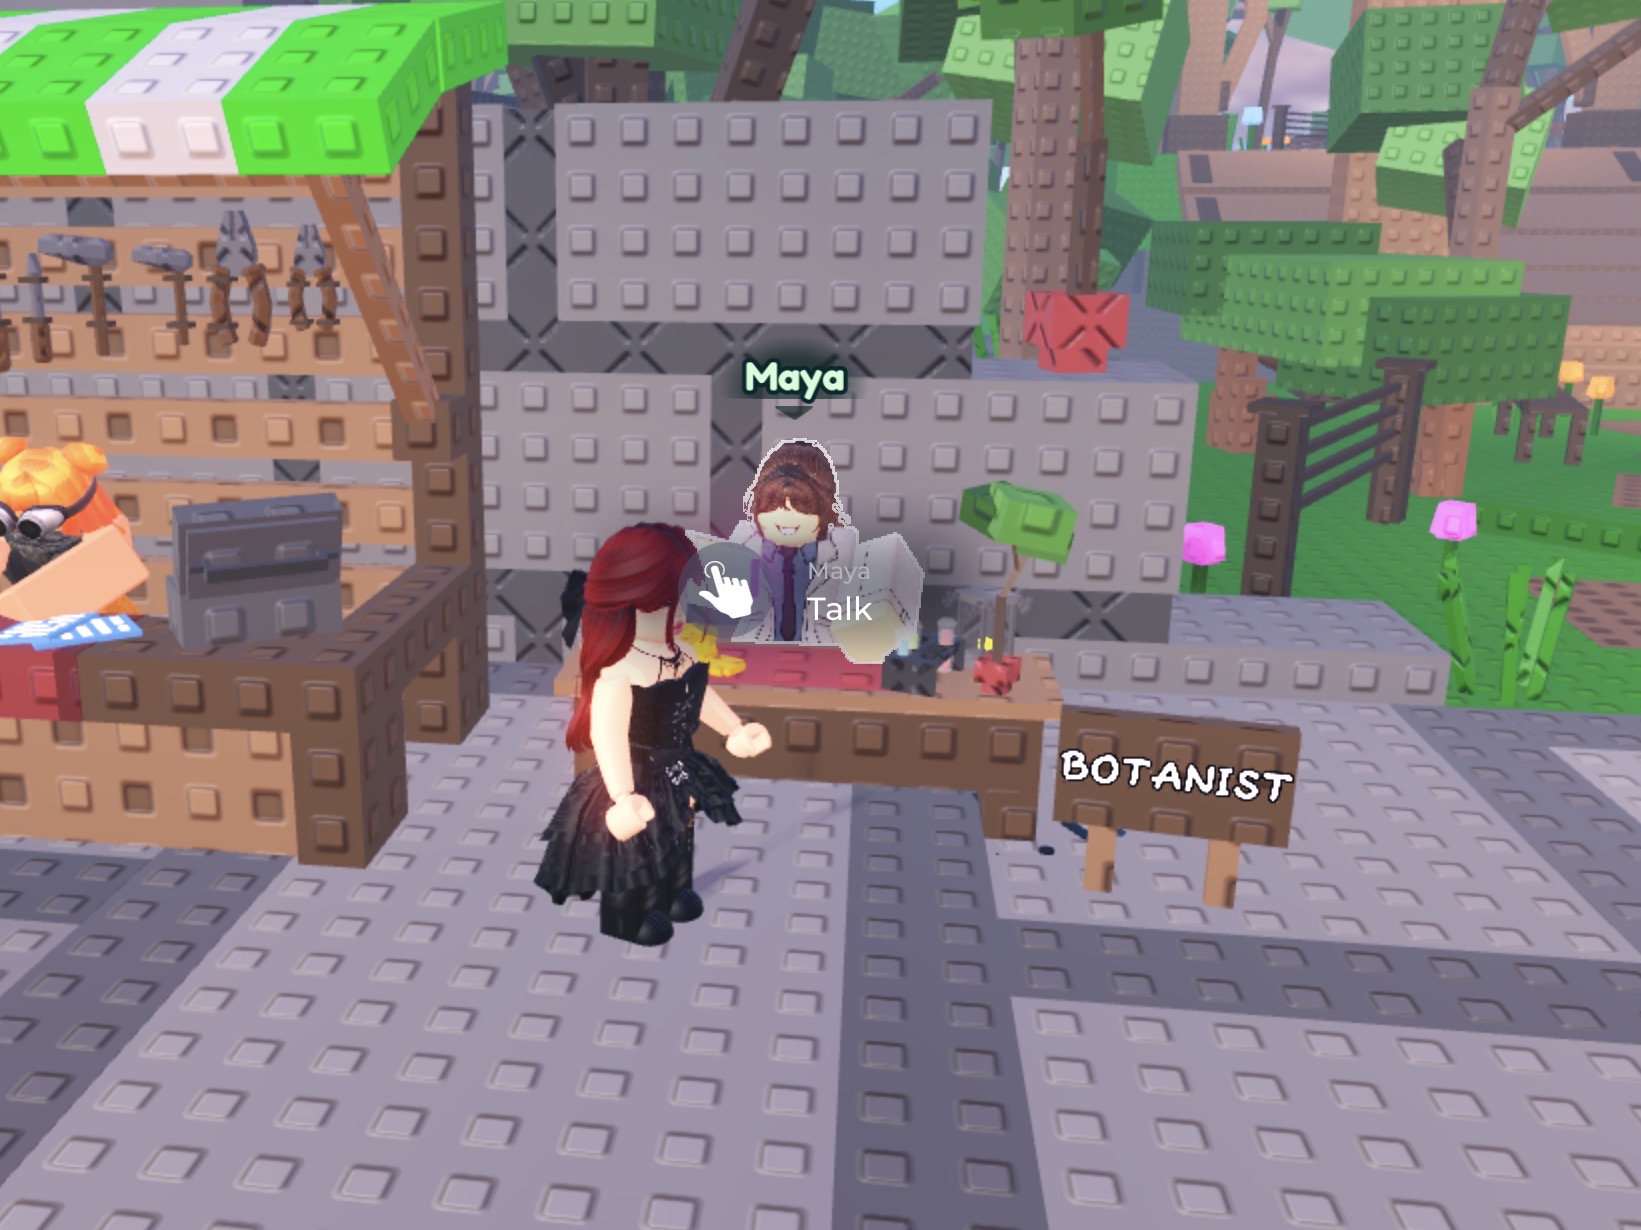
We have a brand new NPC, called Maya, and Maya is a professional Botanist and you can find her with her own bench next to Molly’s Gear Shop.
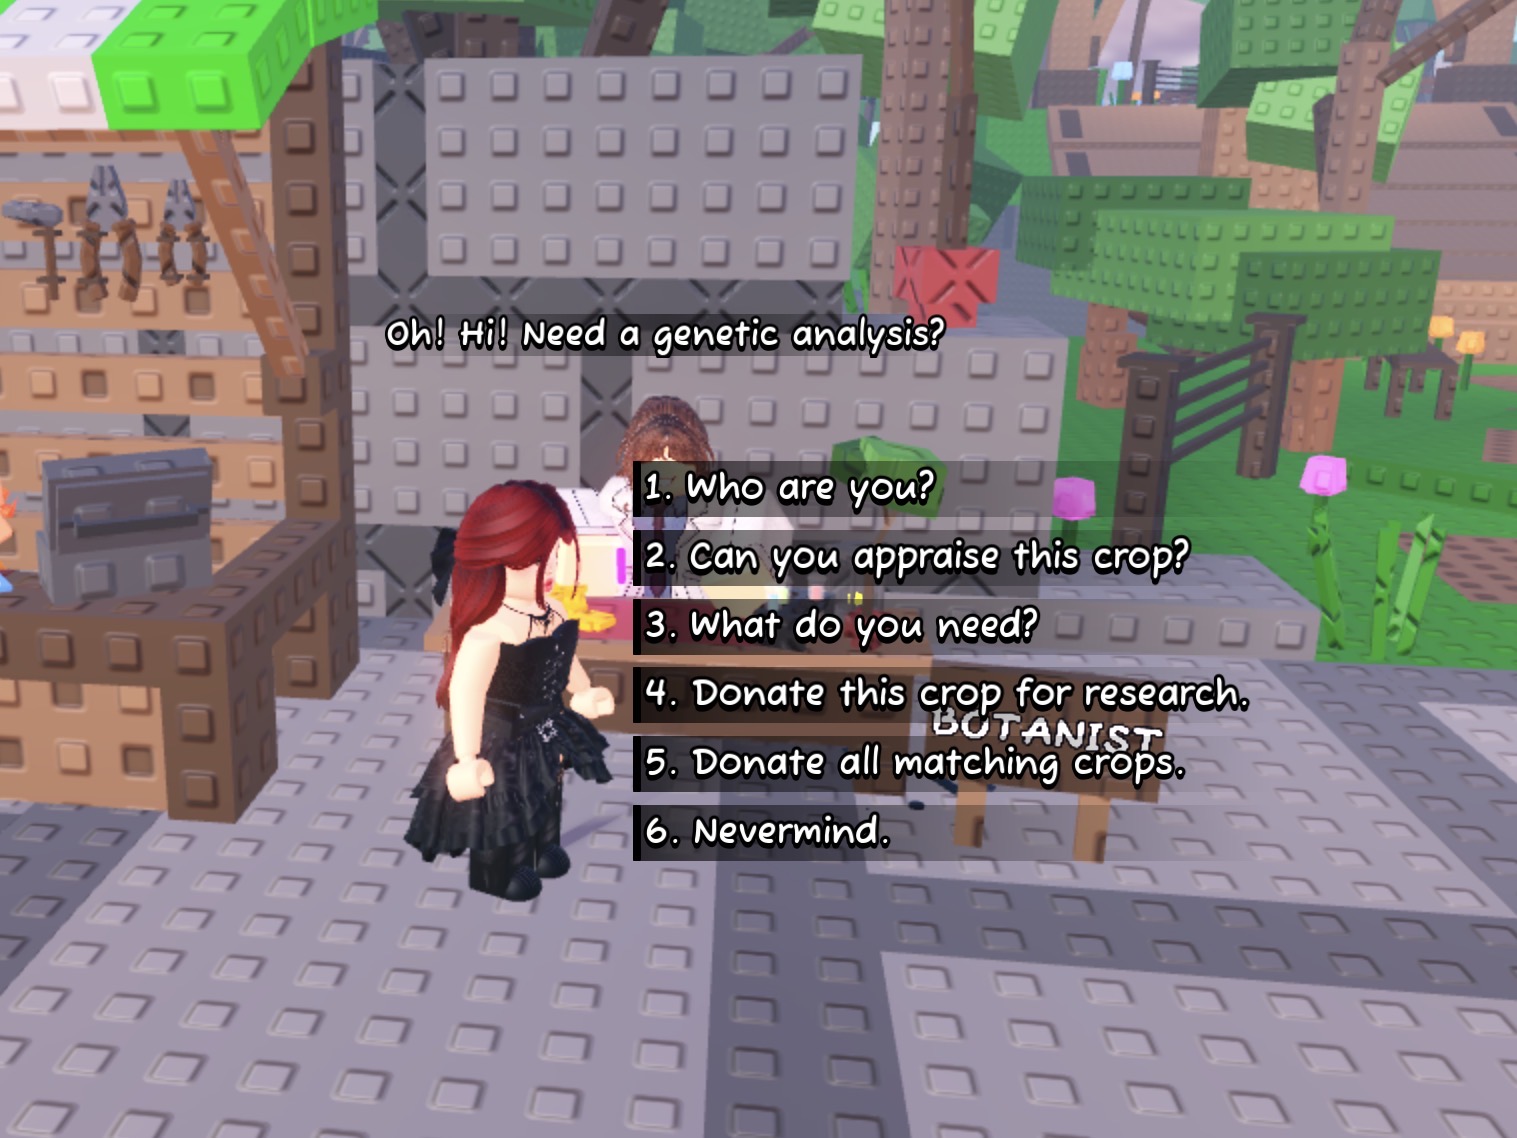
When you talk to Maya, she gives you six options; Who are you?, Can you appraise this crop? What do you need? Donate this crop for research, Donate all matching crops and Nevermind.
Maya is doing “research” and has 40 stages of quest, where she will require you to hand over a specific kilogram weight of fruits with specific mutations.
The mutations Maya could ask you for are:
- Shocked
- Flooded or Soaked
- Foggy
- Starstruck
- Sandy
- Chilled or Snowy
The weights she asks for do change, depending on the mutation. For example, every time she wants Foggy mutated fruits, she needs 2kg of Foggy fruits. When she wants Starstruck fruits, she will only ask for 0.80kg of Starstruck fruits.
What Is The Appraisal Feature and Why Should You Do It?
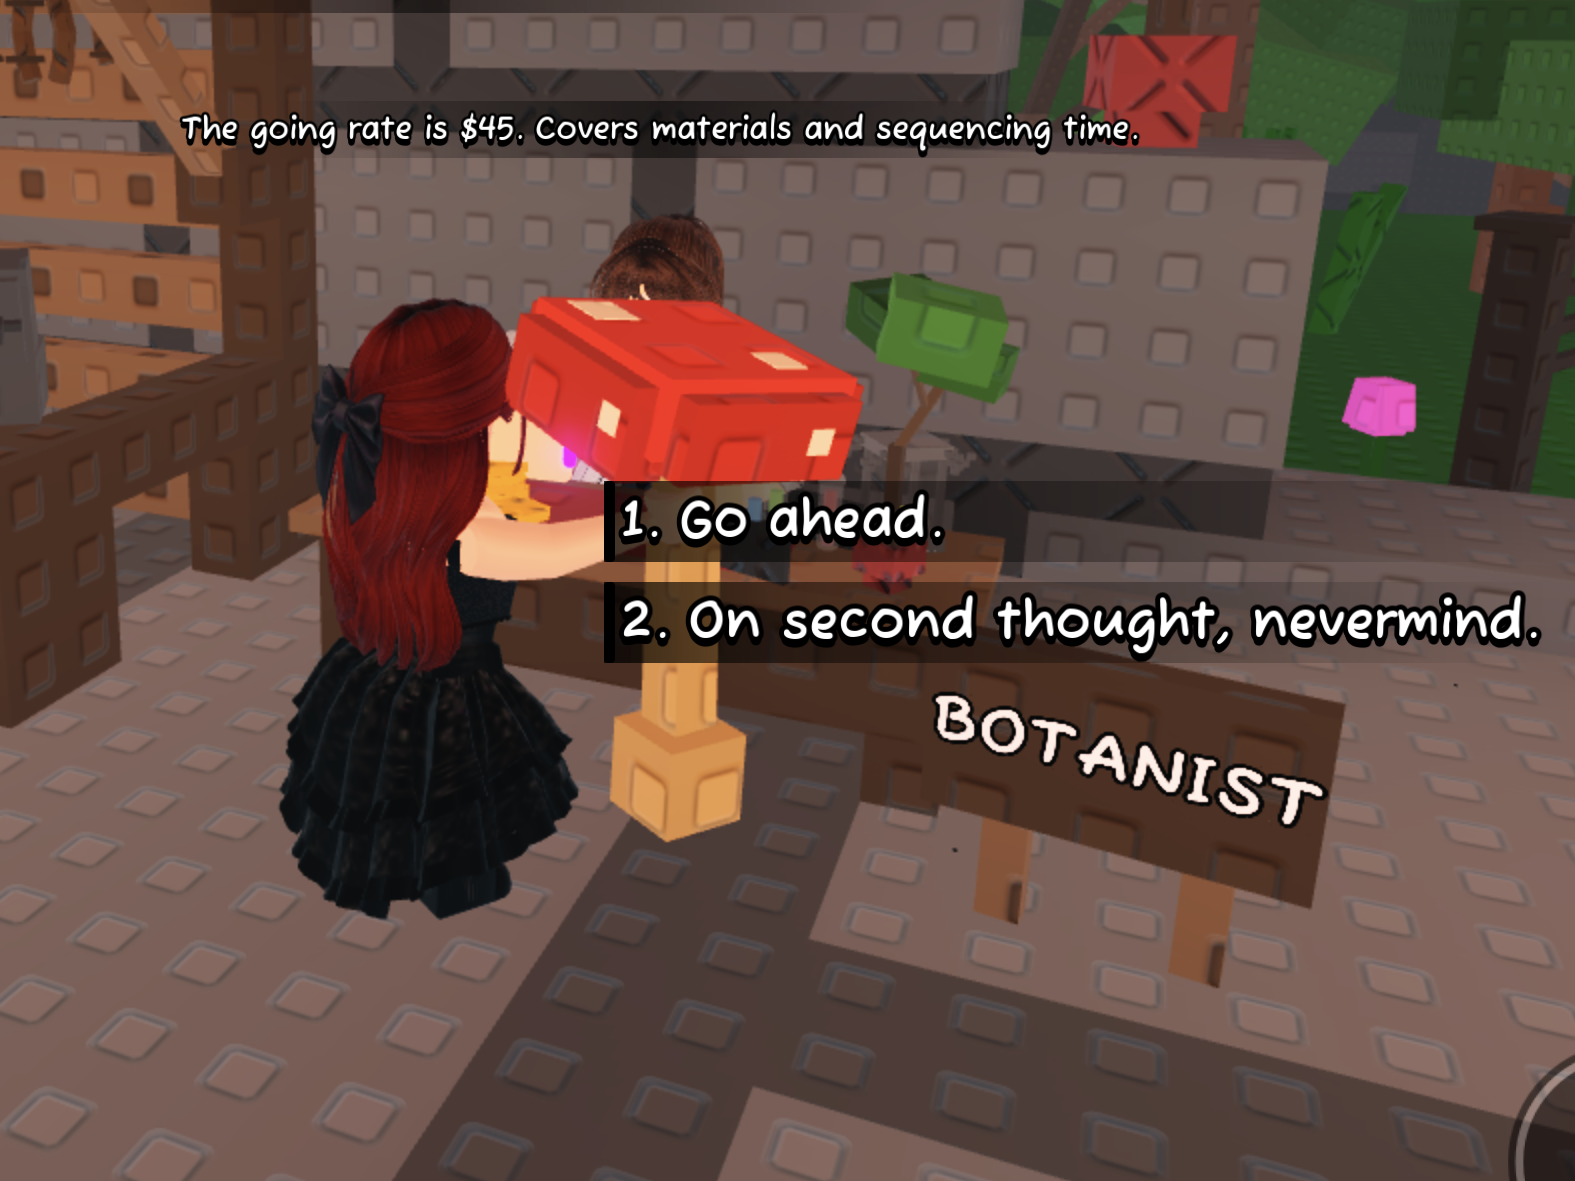
Maya gives you an option to “appraise” a single piece of fruit. She will charge you to appraise the fruit, and the fee changes depending on the rarity of the fruit.
If it’s a low cost fruit, like a Mushroom, you’ll be charged very little, but a Cherry appraisal will cost considerably more.
She will tell you how much the appraisal will cost, and you can decide if it’s worth it.
During the appraisal process, Maya *can* apply a random mutation to the picked fruit you paid to appraise. You have no control over which mutation she will apply, so if she is asking for “Foggy” fruits in the quest, and you appraise a fruit, you won’t necessarily get “Foggy” applied to that single fruit.
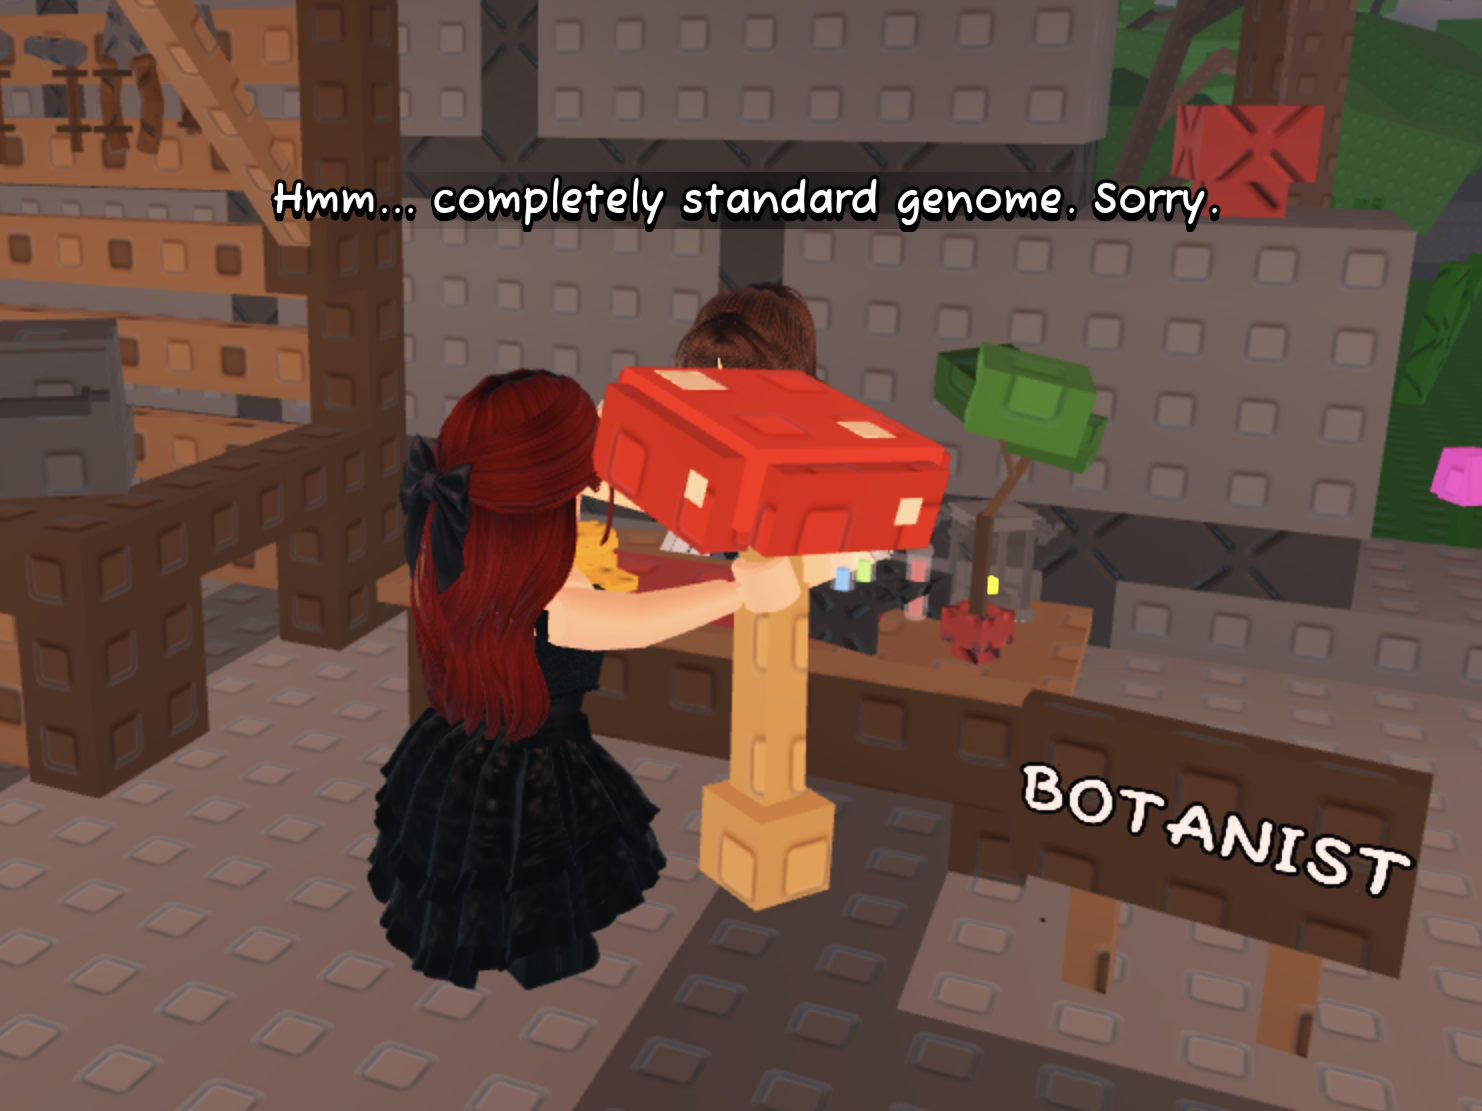
When Maya appraises your fruit, she can tell you that it was just a normal fruit, and not apply any mutation. When she says no, that isn’t the end of it. You can request that she appraises that same fruit again, at a cost again, but you can request she appraises it again.
This is helpful if you manage to grow a massive fruit for example, a potato, and you want to be able to hand it in for a “Foggy” quest, so you could technically appraise the fruit over and over until she applies Foggy, but you will have to pay each time, and it could take ages of doing the interaction each time.

When she appraises a fruit, and applies a random mutation, you get a pop-up message on the screen to tell you which mutation she found on the fruit, and the fruit then instantly has that mutation on it.
You can appraise a fruit that already has a natural mutation already, or a plain fruit.
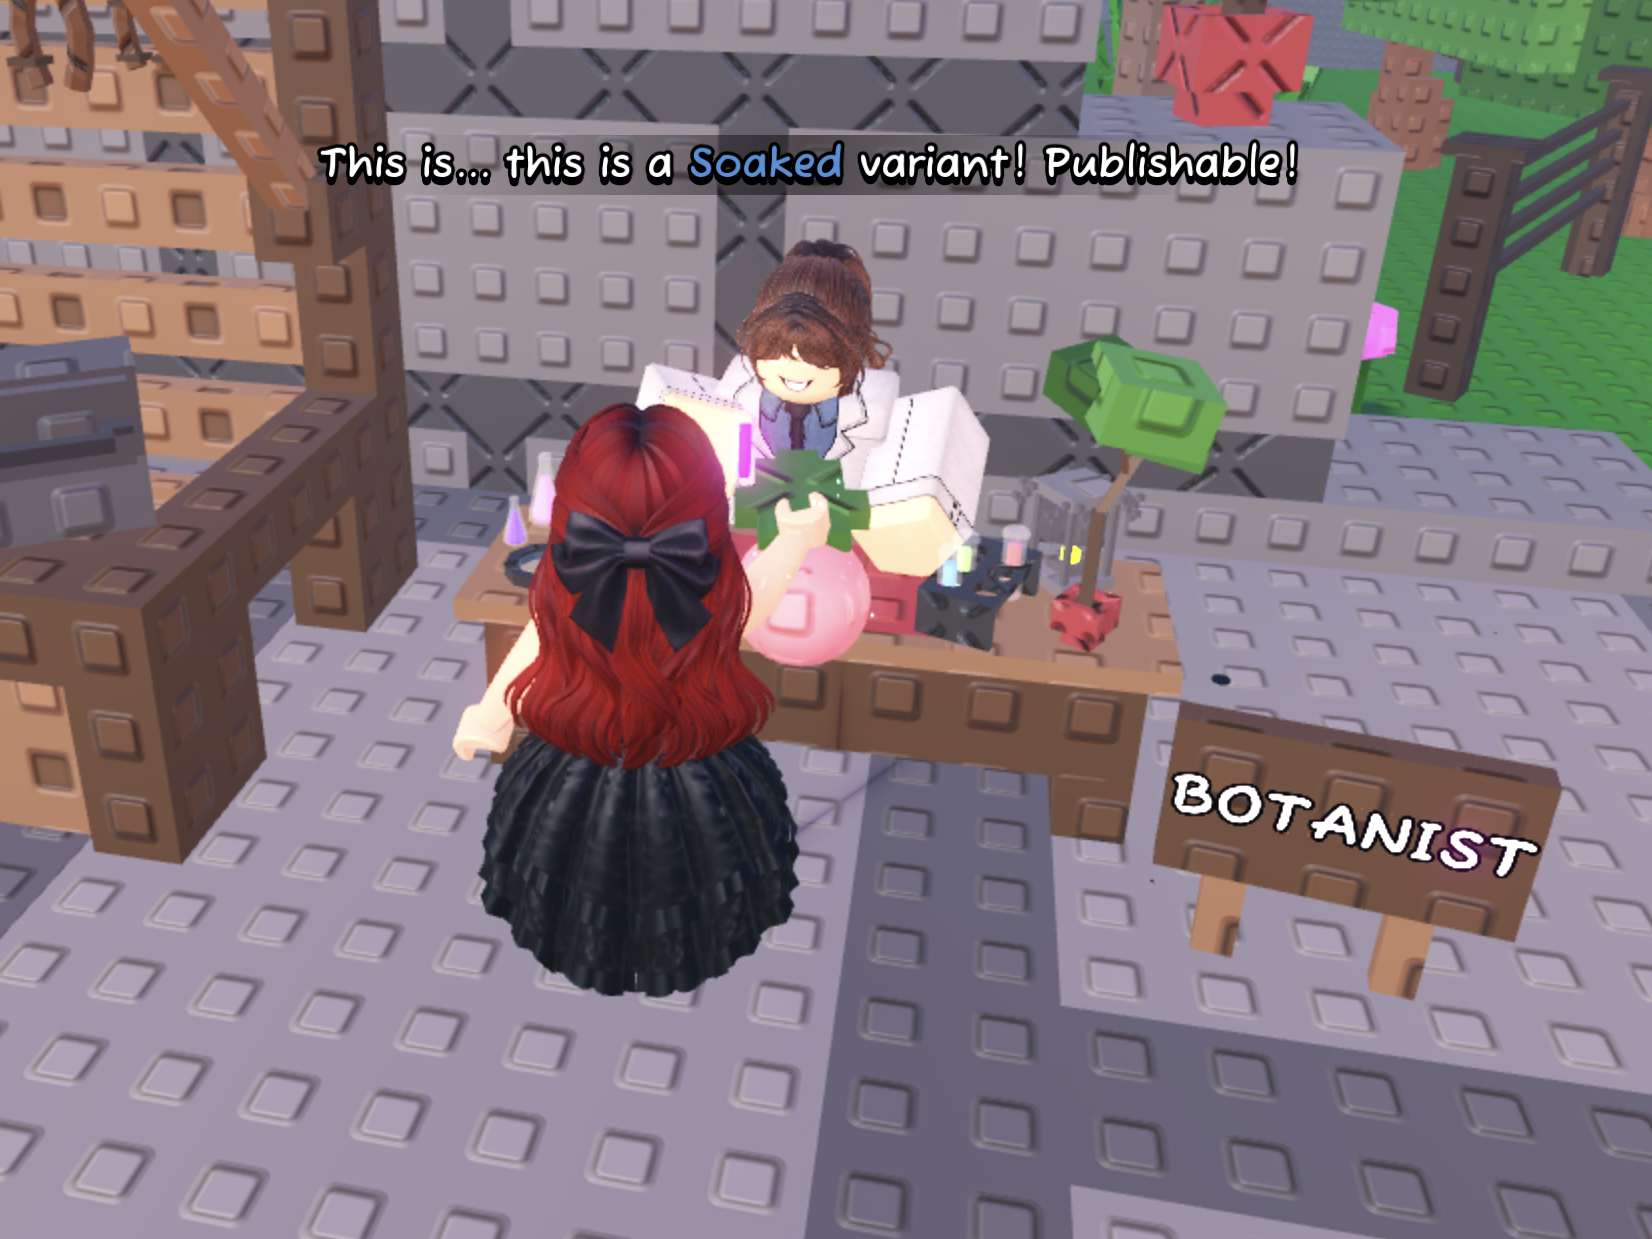
Something very important to consider, if you have a fruit with a mutation, for example, with this Tomato, she applied Snowy first, and then she applied Soaked.
Once Soaked was applied, the mutation combo happened, and the Tomato lost the Snowy and Soaked mutations, because it turned into “Frostbit” Tomato, so now that Tomato *now* cannot be used for any of the Botanist quests at all.
So, be very careful when trying to appraise a fruit that already has a mutation applied, because you could end up with one of the combo mutations, and none of those combo mutations are mutations Maya will ask you for.

What Are The Rewards For The Garden Horizons Botanist Update?
There are 40 levels within the Botanist quest, where she will ask you for 40 different mutations (mutations are repeated multiple times with the 40 levels of the quest).
Each time you complete her request, for example Foggy mutated fruits, Shocked mutated fruits or Chilled mutated fruits, you will receive either one, two, three or four IGMA Seed Packs.
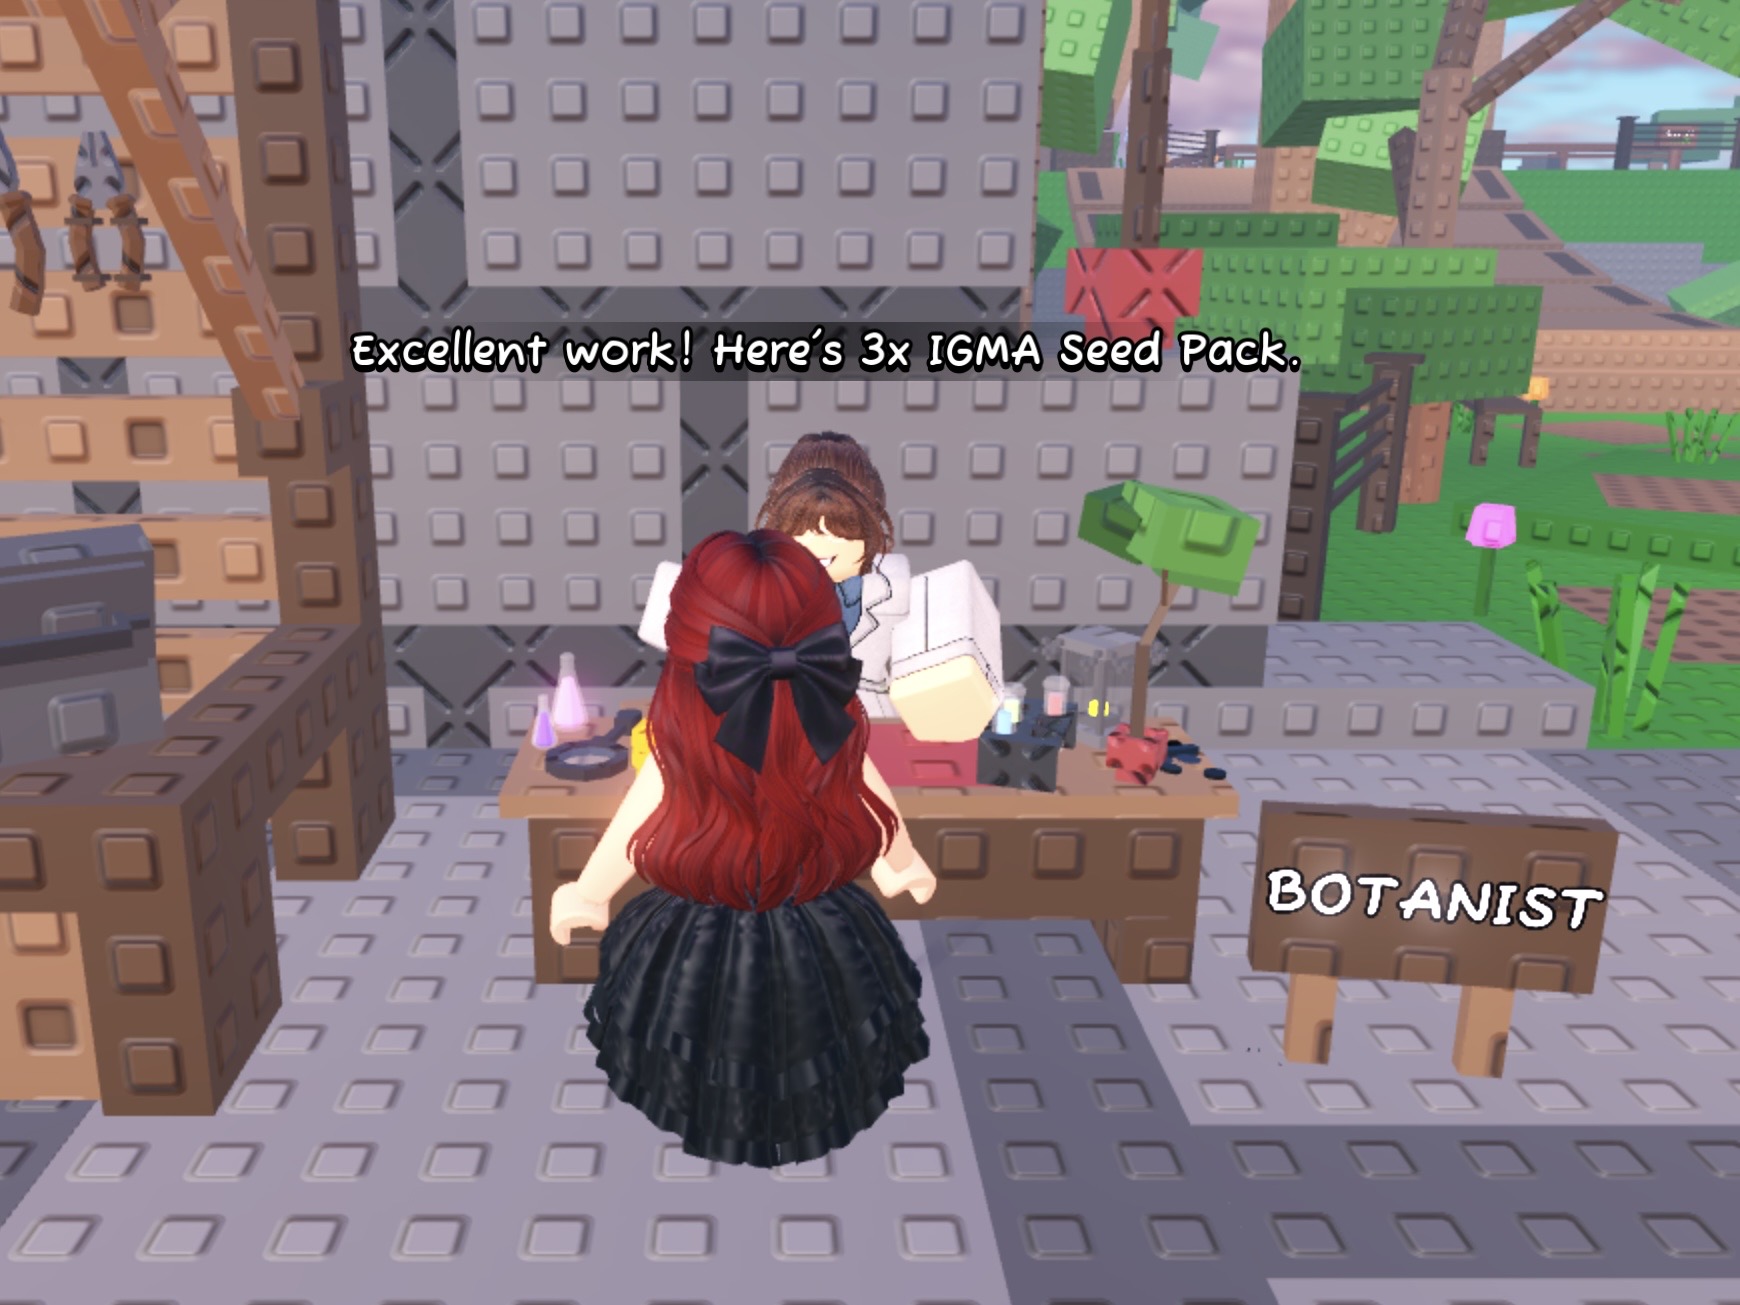
The IGMA Seed Packs can be purchased via the in-game shop, but you will receive one, two, three or four IGMA Seed Packs for completing each level of Maya’s quests.
The number of seed packs you receive is random, and is not tied to the rarity/multiplier of the mutation she needs – I have extensively tested this with completing the quest twice (so 80 levels I completed).

I have received 4 x IGMA Seed Packs for handing in 2KG of Sandy fruits, and 1 x IGMA Seed Pack for 0.80KG Starstruck fruits. It is not connected to rarity, and it’s not like you’ll get “three seed packs for every 2kg of X fruits”.

Once you’ve handed in all of the mutations for all 40 levels, your final reward is 1 x Premium IGMA Seed Pack, which normally costs you 169 Robux.
As well as receiving 1 x Premium IGMA Seed Pack, you also get the usual one, two, three or four IGMA Seed Pack reward that you get for the rest of the other 39 levels.
The benefit of getting the Premium version of the IGMA Seed Pack is the better odds and lower pity of getting the rarest seed.
Inside the IGMA Seed Pack, you get the following seeds:
- Biohazard Melon – 44% chance
- Lablush Berry – 33% chance
- Starvine – 16% chance
- Radiant Petal – 5.5% chance
- Octobranch – 1.5% chance
Best Tips For Doing The Garden Horizons Botanist Update
The Botanist quests rely on heavy, mutated fruits. Last week in the game, we all focused on making money, but this week it’s all about growing super heavy fruits, and waiting for those fruits to collect mutations.
There are many seeds in the Seed Shop and the Seed Packs, but many of those seeds grow quickly, but the fruits are tiny.
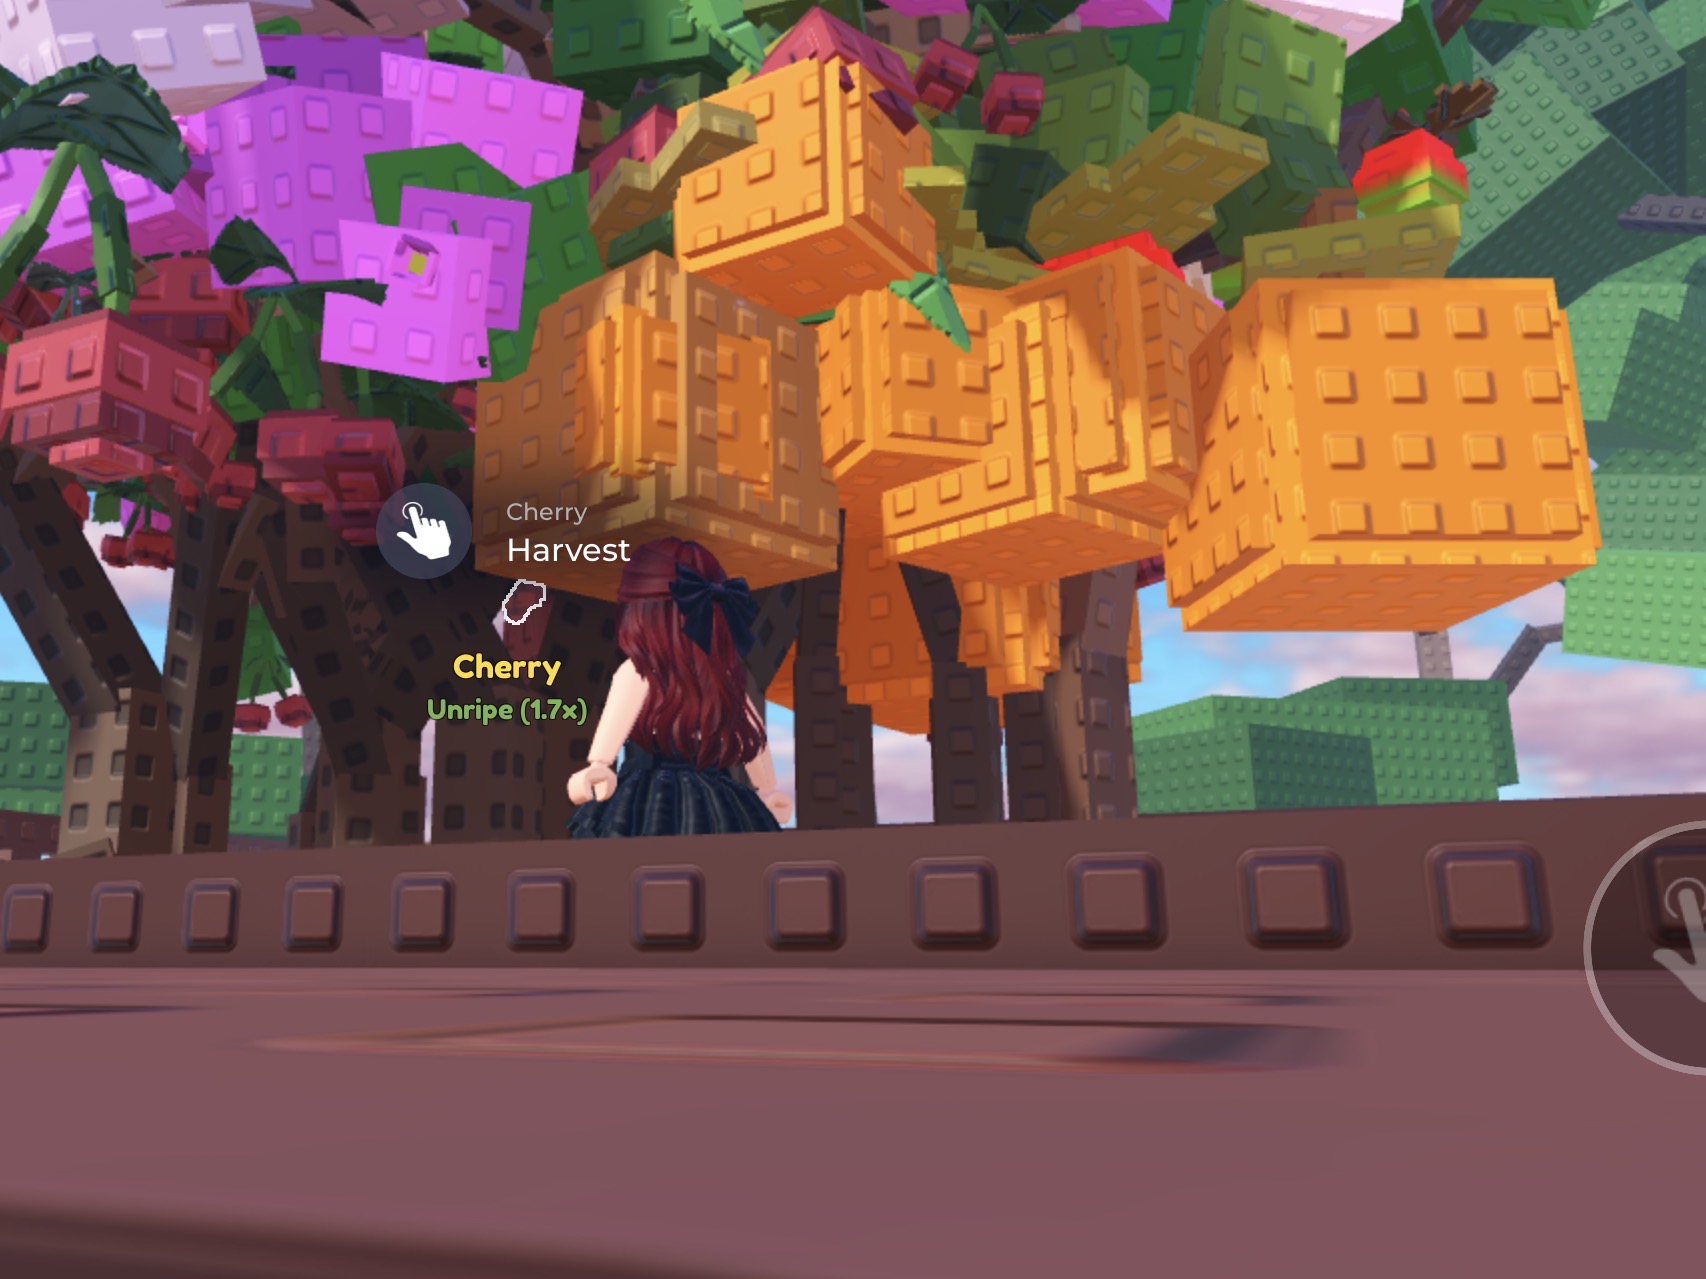
Cherries are super valuable fruits, but even with sprinklers, the Cherry fruits grow very small and are pointless for this quest in all honesty.
You want to plant seeds that are multi-harvest plants with fruits that can get very heavy.
The worst seeds for this quest are:
- Bananas (you only get 4 bananas per tree and they do not grow heavy enough)
- Strawberries (they grow quickly but they have a tiny weight)
- Corn (they grow quickly but you get one single corn per plant, and they’re small in weight)
- ANY single harvest seeds – onion, beetroot, wheat, cabbage or bamboo.
- Mushrooms (you only get 3 mushrooms per seed, and they have a tiny weight)
- Tomato (you only get 3 tomatoes per seed, and they have a tiny weight)
- Rose (they give you more flowers per seed, but they always have tiny weights)
- Cherry (they grow so lightweight even with sprinklers, and are very slow growing)
- Olives (you get 20 Olives per plant, but they are very lightweight and very slow growing).

The best seeds for this quest are:
The best seed full stop is the Potato. You can grow up to 8 Potatoes with one seed, and they can grow very heavy fruits. With the Sprinkler Method (Basic Sprinkler, Turbo Sprinkler and Super Sprinkler), you can grow giant fruits, and each Potato, when mutated can fulfill each level of Maya’s quests.
Now we have the Trowel (from the Gear Shop), you want to place your Potato seeds/plants in a circle, as tightly packed as possible, like we used to do with the Moon Melon Method in Grow A Garden.
You can then place your three sprinklers on one half of the circle, and then make sure you add some Basic Sprinklers on the opposite side, to ensure every plant has coverage from the 3 sprinklers.
Potato seeds are 100k each, and you can set-up the Discord notifier, so you get pinged every time one is in stock. You can literally do this entire quest with nothing but potatoes – they are genuinely the meta for this event.
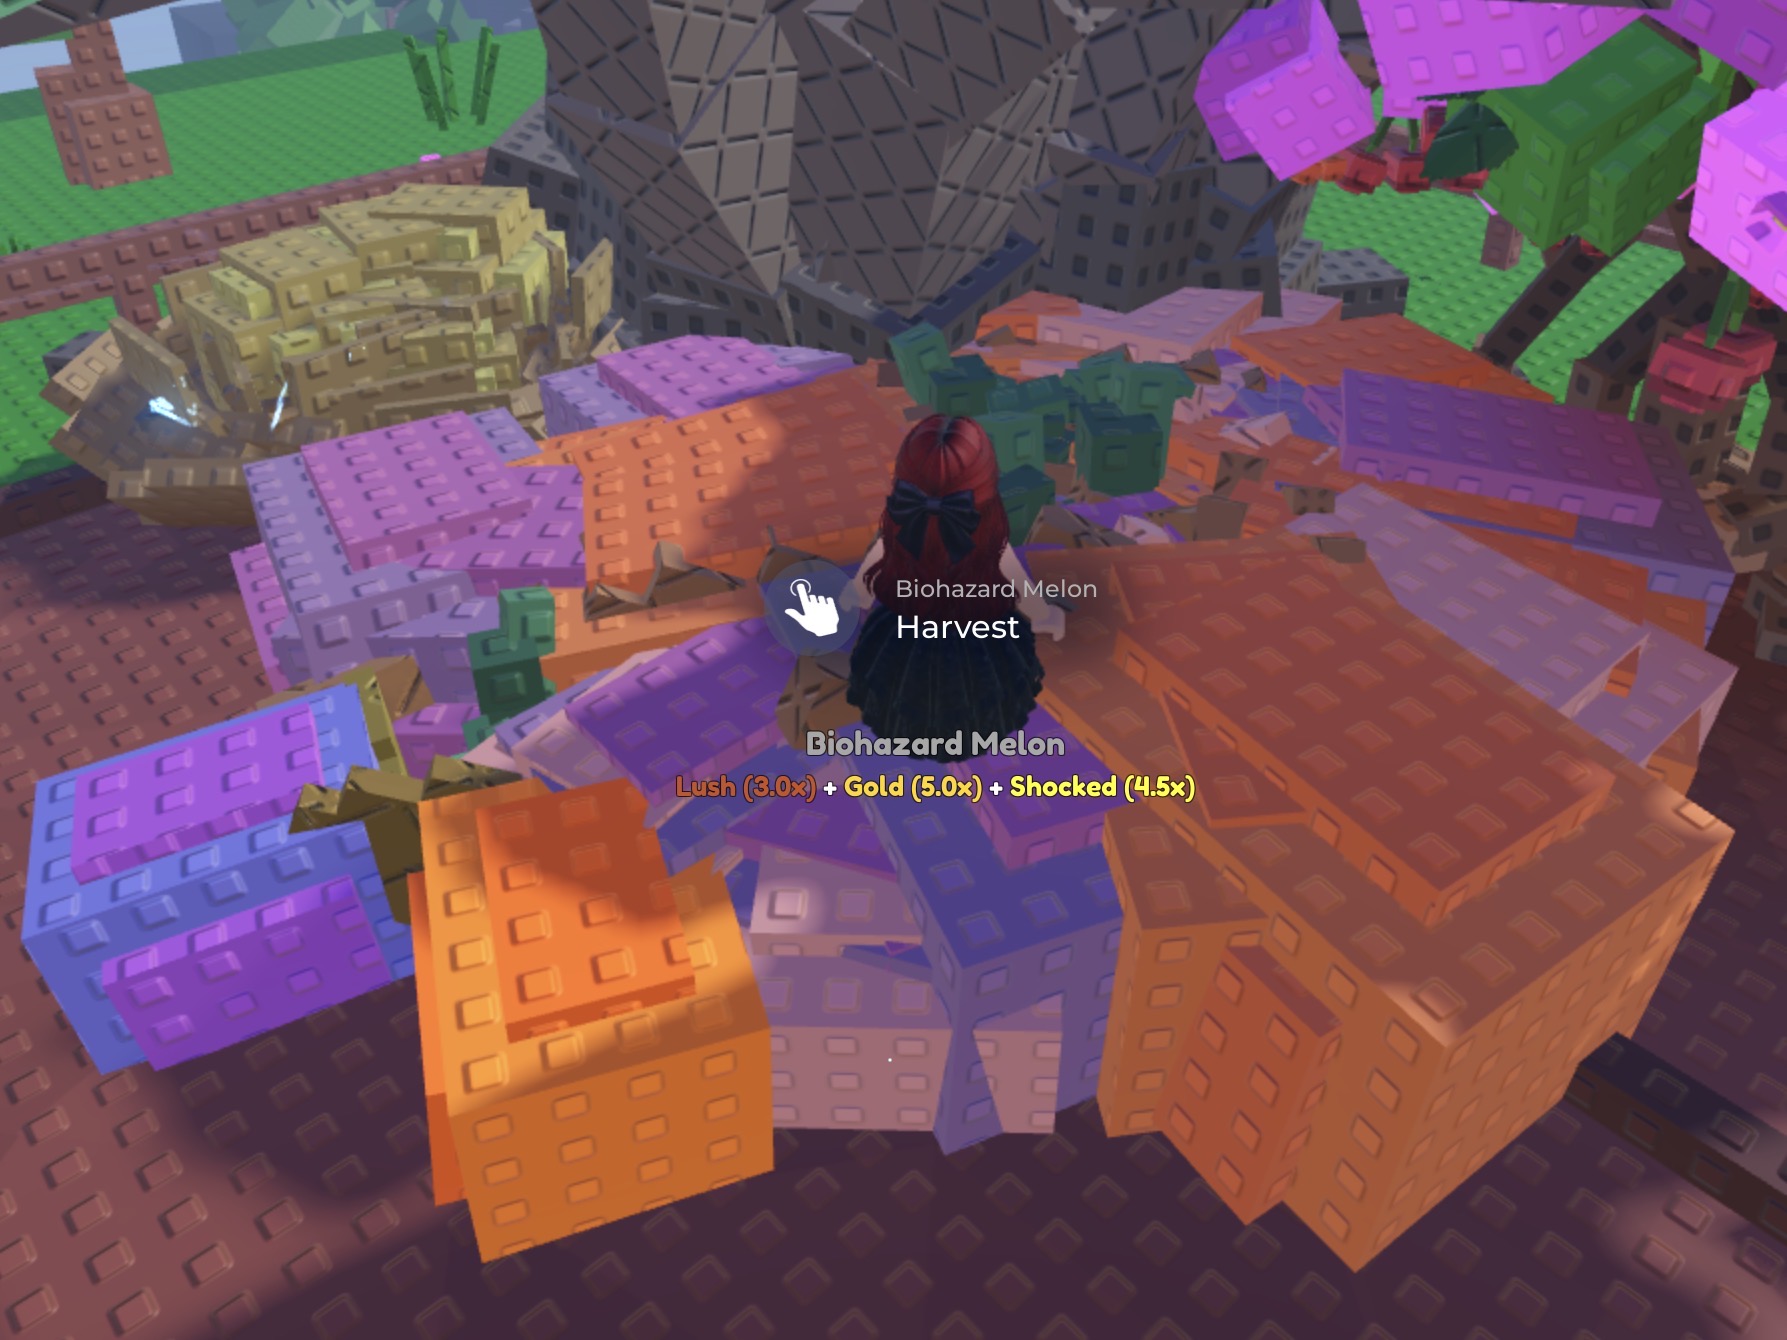
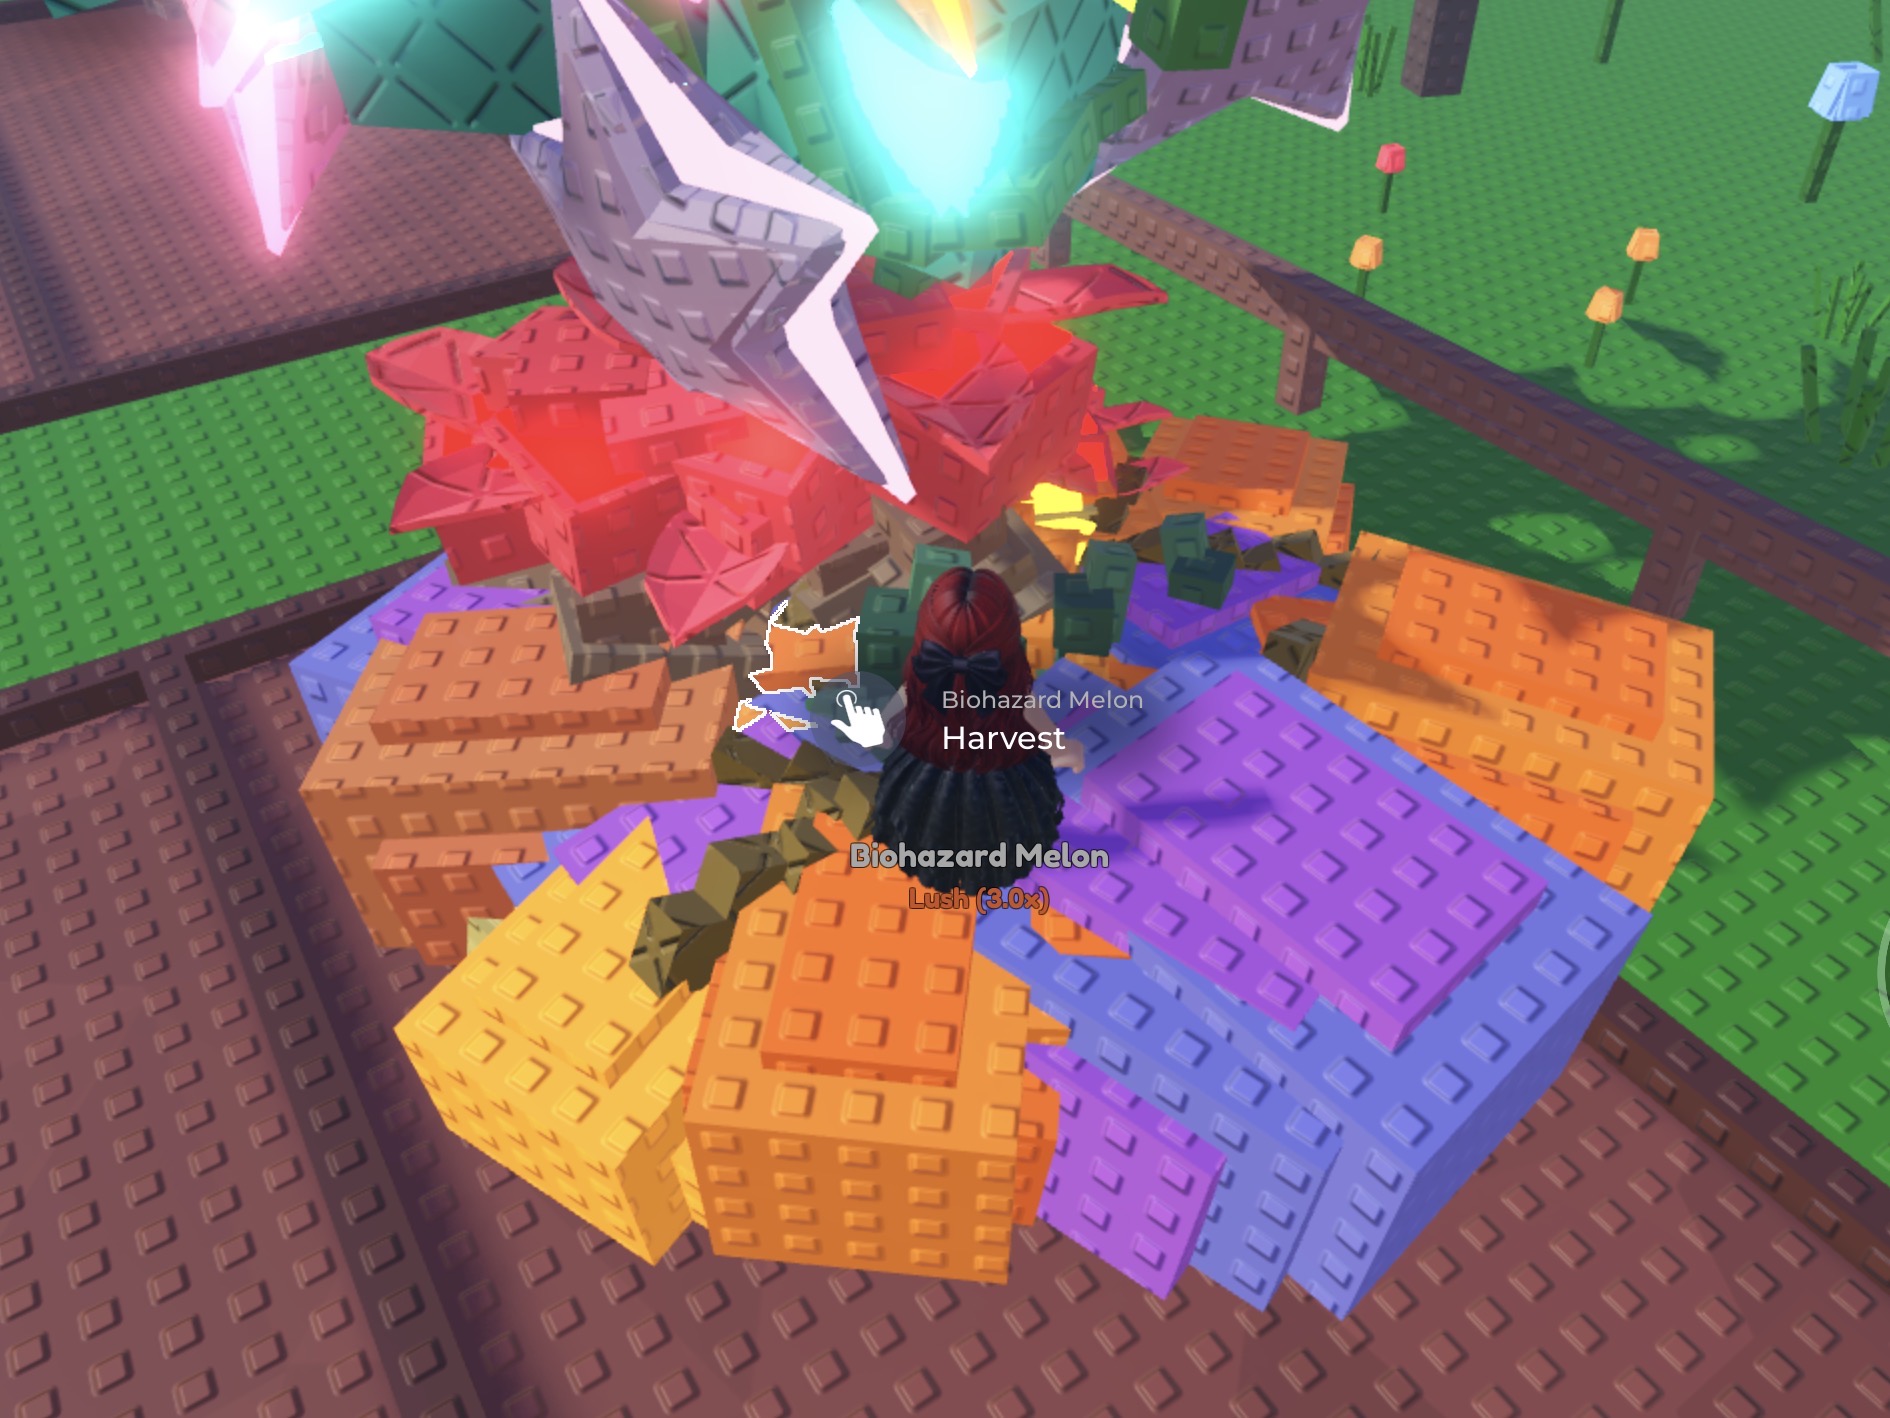
Once you’ve handed in potatoes for several levels of the Botanist Quest, you will get the IGMA Seed Packs, and the Biohazard Melon is the second best seed to use for this quest.
The Biohazard Melon is the most common seed in the IGMA Seed Pack, but they are the most OP seed for this event, as they grow very large naturally, but with the 3 x sprinklers, they grow even bigger.
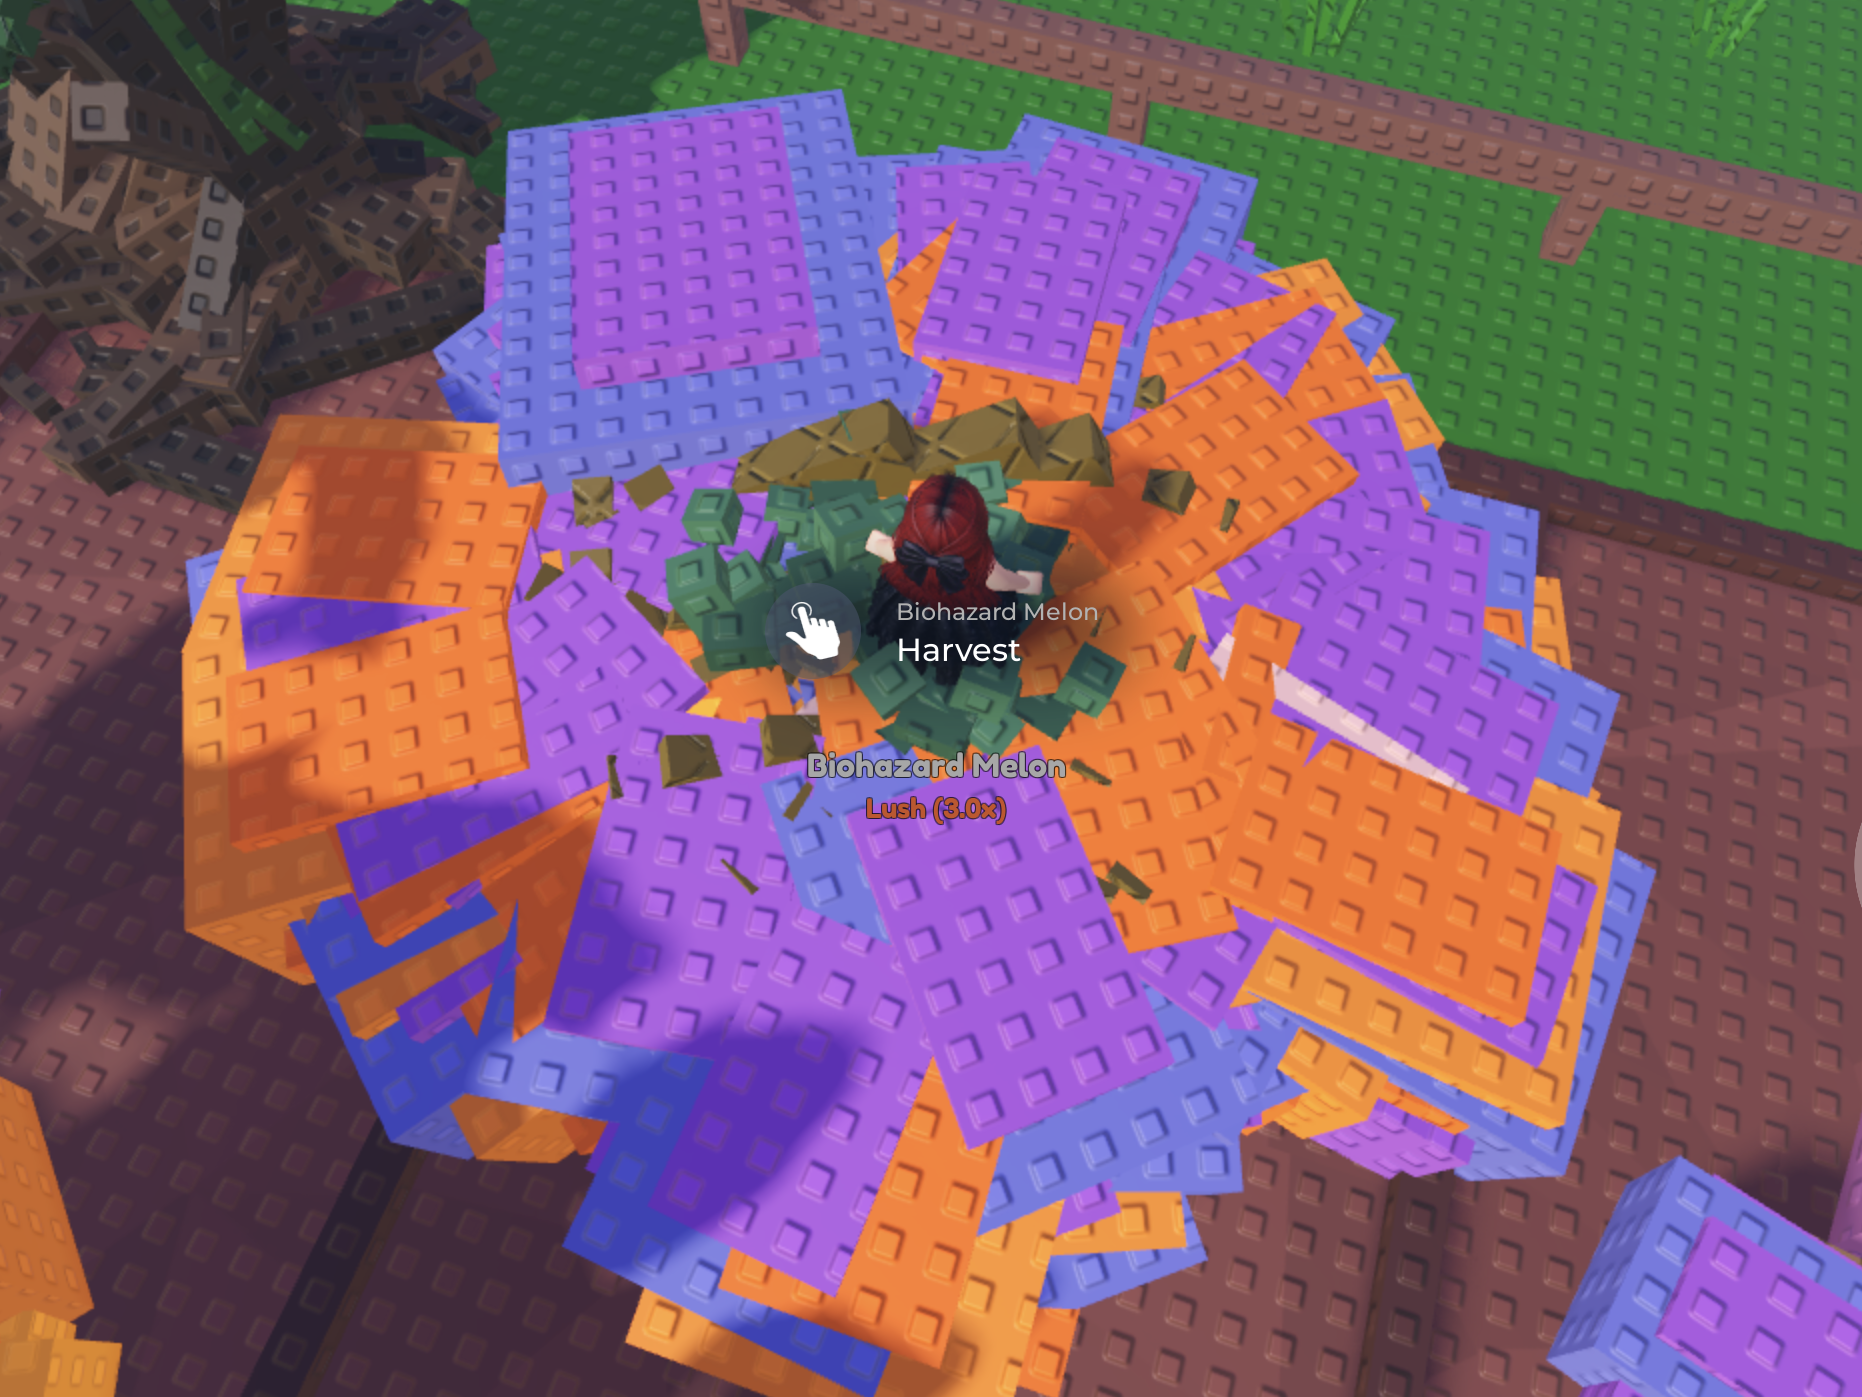
You need to channel the Moon Melon method from Grow A Garden, and place your Biohazard Melon seeds in a circle, just like the potatoes, so the melons are easy to collect individually for each mutation quest.
So, start with Potatoes to complete around 10 levels of the quest, and then use the Biohazard Melon seeds from the seed packs to give you even more chances of huge, heavy mutated fruits.
Once you’ve got your huge potatoes and Biohazard Melon fruits grown, you will have to AFK to collect mutations, but it’ll be worth it, as you can collect fruits easily and quickly, to get as many IGMA Seed Packs as possible.
Oranges are the third best seed for this quest, as they grow very heavy fruits when you use the three Sprinklers together.
You do only get 4 x Oranges per tree, so you are limited, but they’re still handy to have planted, so you get more chances of picking up the mutations, ready for all of the mutations Maya will ask you for.
If you plant seeds like Bananas, Tomatoes and Corn, you’re going to need so many fruits just to reach the weight requirement of each mutation.
It’s such a fun event, and it’s nice to have something to do, once you have the mutations of course, and all of the plants in the IGMA Seed Pack are visually amazing, especially the Starvine and Radiant Petal.
It is definitely worth doing the quests, and hopefully these tips, from someone that has completed the quests multiple times are actually helpful, and help you farm a ton of these new seed packs as soon as possible.